Monday, April 29, 2013

small confessions…


Hello there friends!  I know it’s been a while and my apologies for that!  I have been struggling to keep up with posting for a while for good reason – I just had baby #2!  We welcomed our new baby girl last week after a long and not so pleasant pregnancy.  We’re thrilled and thoroughly enjoying having her home with us.

I have a few things to post and I’m trying to get my act together to get up and running again so please be patient :)

Stephanie

Tuesday, April 2, 2013

Pin 37–diet coke brownies

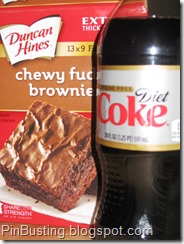
I think we all have high hopes for this one!  Supposedly you mix a can of diet coke with a box of brownie mix, bake and voila, super easy yummy IMG_8638diet brownies.  I’m not a huge diet food seeker-outer but I LOVE a good brownie – especially warm with some ice cream on top… and maybe chocolate sauce…  I digress.  So I saw this pin and thought wouldn’t it be amazing…

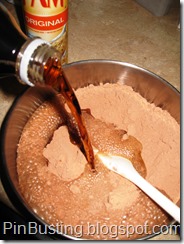
So I bought some diet coke (we don’t keep diet sodas in the house… part of my if you’re going to do it i.e. eat badly then do it right philosophy) and slowly poured 12 oz into the brownie mix.  Holy Crap does it fizz and look weird.

IMG_8639IMG_8641IMG_8643

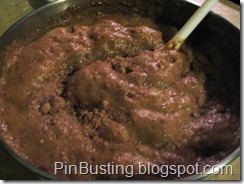
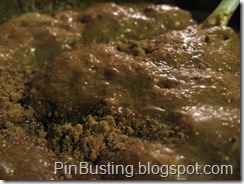
So after a while of stirring and waiting and adding and stirring and waiting and stirring some more, brownie batter looks like this. 

IMG_8647

A little thinner than typical and not as dark of a color.  Also, weird foamy looking texture.  I love to eat batter but I have to say this did not entice me.

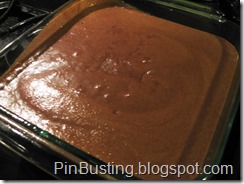
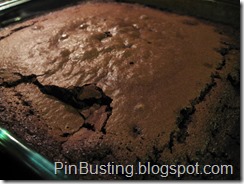
So into the oven it goes, according to box directions but with the possibility of +7 minutes per pin source.  My box said 30-33 minutes so I set the timer for 33.  At 33 the toothpicks came out totally gooey, and again a few minutes later.  In total it took 33 +12 minutes for the toothpicks to come out better but still with some stuff on it, just not as gooey.  The edges looked over cooked but the center looked ok.

IMG_8649IMG_8650

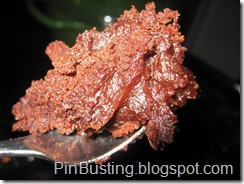
I cut into it – what a mess.  Totally sticking to the knife and seeming a bit underdone still.  The real test – eating it.  Husband had it warm and plain I had mine with ice cream.  We both agreed on the same exact thing – yuck.  Frist of all, weirdest texture ever.  Almost jello like cake.  Totally weird and unappetizing.  Second, at first taste it wasn’t too bad.  You can’t taste coke or anything but it is definitely not as chocolatey as a regular brownie.  Third, yucka after taste.  After a few bites my opinion changed from ‘eh ok’ to just blech.  I wouldn’t have finished it except that I had ice cream to wash it down.  Husband is a bit less fussy and powered through but agreed on the blech.

IMG_8652

Bottom line – desperate measure

If you’re a big dieter and desperate for a brownie then I imagine this might be good enough.  If you’re like me and prefer to bake with actual butter and don’t buy diet soda, do not torture yourself with this.  It is a waste of brownie mix.  Again, if you’re all about dieting and you haven’t eaten a brownie in 5 years then you may not notice its shortcomings.  I, on the other hand, thoroughly missed the fat and calories!

Stephanie

Tuesday, March 19, 2013

Pin 36- make body wash from bar soap

Toiletries are some of the most annoying things to buy.  Not because I don’t love perusing the scents or intended benefits or that I don’t love IMG_8547treating myself the occasional totally unnecessary but fun to have makeup or lotion or whatever.  It’s because it is all super expensive!  All of it, even the stuff you HAVE to get, I’m talking about toothpaste, soap, and lady products here.  And you just have to keep buying it it.  In an effort to skimp some cash since I became a stay-at-home Mom one of the things I’ve tried to do is buy a lot of generic toiletry stuff, especially body wash.  I’m a big fan of Dove but at somewhere between $5-7 a bottle it was one of the first generics I went for.  I stopped using bar soap even though it is cheaper a long time ago because I hate cleaning the scummy mess it leaves in the shower and supposedly it’s a little easier on your pipes.  Anyways, when I saw THIS PIN from Stacy at the The Brady Bunch to make body wash soap from bars of soap I knew I had to try it.  I chose the specific Dove pin because that’s my brand of choice but I have seen it claimed with random types too.  According to Stacy’s math it costs only a $1.72 for a bottle… super awesome!

The pin says to shave down the bars then add to water, heat until melted then cool.  Pretty straightforward right?  The ratio is a 4 oz bar of soap to 2 cups water.   Stacy said it came out a bit more watery than the actual Dove bodywash so I tweaked mine to about 4 oz to 1.75 cups.  I put all the water in a pot over med-low heat and started grating the sops right into the pot.

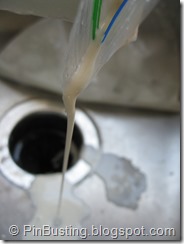
It took me 10 minutes to do 2 bars of soap using a straight grater.  I had to reduce the heat a bit.  Overall it took about 30 minutes of heating and stirring occasionally for the soap to look all melted and without clumps.  I let it cool for quite a while but it still seemed warm so I let it sit overnight.  By morning it was obviously ready to bottle.  And that’s where I ran into a problem.  Because I made it thicker I could not pour it into the bottle (empty generic soap bottle) and a funnel didn’t work either because of the thickness.  I ended up making a giant mess scooping the soap into a ziploc the cutting the corner and using like a pastry bag.  This worked well enough but I ended up with a very soapy situation!

Bottom line – do it! great money saver!

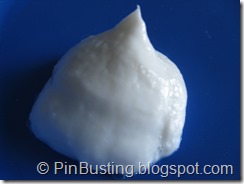
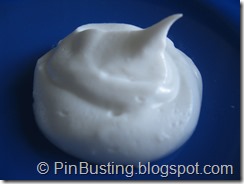
After using for a few days I can say it’s better than the generic and as good as the real thing.  The only real difference I noticed is that my homemade soap has a stronger fragrance than the actual.  I’m thrilled with the results and feel like I’m getting a little bit pampered in the shower but only spending a little over a dollar on a bottle! :)  Compare the dollops yourself – bet you can’t guess which is the “real thing”!

IMG_8557IMG_8558

The one on the left is the homemade.

A few tips if you’re going to try:

1.  grate over a large bowl before starting to heat the water.  Just grate all your soap first over a large bowl to keep the mess down.  I ended up with soap shards all over my stove.

2.  Turn on the heat after adding all your soap.  It doesn’t take long to heat up and you won’t have to monitor the heat while trying to grate.

3. Once the soap is cooled enough that it’s not steaming etc but warm enough that it’s still more fluid, that is when to pour into your container.  Or if you wait until completely cooled see if you can pour thicker soap into a large ziploc.  Another set of hands to manage the bag while you pour/scoop is a good idea too.

Have fun!  I’m sure that this would work for any soap but you’ll need to do some trial and error for the amount of water.  I would think that the creamier the soap is the less water it needs but I’m just guessing.  Buy a trial size or try just one bar at a time to get it right. 

Stephanie

IMG_8559


Thursday, March 14, 2013

Pin 35 - make ice cream in a bag

Homemade ice cream in 5 minutes?  Yes please.  According to my IMG_8535husband we did this back in 5th grade science class.  I have no memory of this but I do remember making butter in third grade and putting it on saltines because our teacher forgot to get bread.  Ha…  Anyways, I figured it was still worth busting because of a few reasons.  It might not taste good.  It might make a giant mess.  It might not really work well.  And who knows what else.  So I decided to give THIS PIN a try.

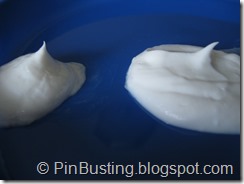
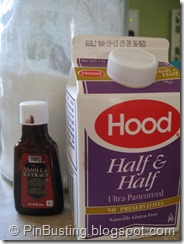
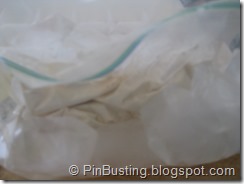
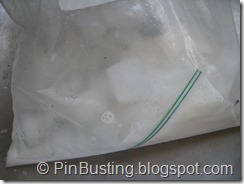
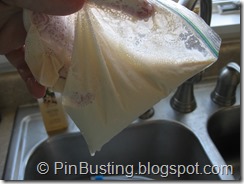
I followed the recipe exactly, 1/2 cup half and half, 1 Tablespoon of sugar and 1 teaspoon of vanilla in a small bag with ice and salt (no measurements given) in a bigger bag.  IMG_8539Put the small bag in the big bag seal and shake for 5 minutes.  A monkey could probably follow these directions.  So I started shaking.  And shaking.  And shaking.  Maybe I’m a wuss but my arms got a little tired… not to mention my hands were freezing.  So I took a short break and broke out some over mitts which at least helped the latter problem.  Anyways I shook for over 5 minutes and nothing happened except ice melting.  Could this be so sensitive that it must be 5 minutes of shaking WITHOUT INTERUPTION??  So I let it sit for a minute or two then tried again, only this time no breaks at all.  And I shook for 6 minutes.  Still nothing.  The liquid just never even came close to freezing!  AND my bag was leaking a little resulting in a yucky ice, salt, and creamy mixture in the big bag.  Luckily that bag didn’t leak!

IMG_8540IMG_8542IMG_8544

Bottom line – emergency resort only

So 5th graders might be able to do this but I wasn’t.  Can’t say I’m thrilled about what this might say about my abilities.  If it doesn’t work every time it’s not worth my time trying to do it.  The only real circumstance I would is under some sort of child or weather induced house arrest situation with a major ice cream craving emergency.  And even then if there was any possibility of just going to the store that would be easier, or having the husband stop on his way home.  Or even calling my mom if I was that desperate!  Either way, just get an ice cream maker if you want homemade!

Stephanie

Tuesday, March 5, 2013

Pin 34–razor to fix pilly things

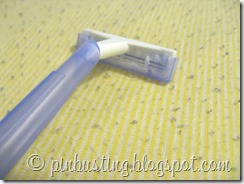
Pilly sweaters drive me nuts.  Especially because it looks hor-ren-dous in the armpit area but also because it can make an awesome expensive razor to shave fabric pillssweater I love look like I just salvaged it from the trash.  I’ve seen a few variations of THIS PIN claiming you can shave the pills right off!  I’ve had a fuzz buster thingy in the past but a decent one isn’t exactly the cheapest item and if it comes down to it, the budget allows for diapers not fuzz busters!  {side note – one of the pins with this claim has orange razors in the pic and actually leads to a nonsense website}

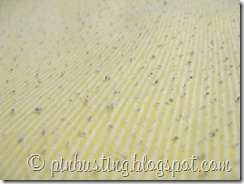
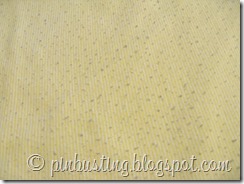
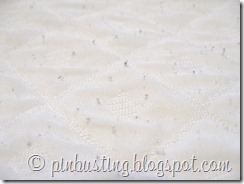
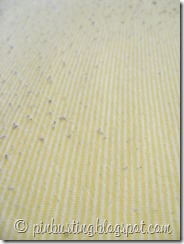
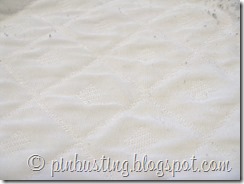
So at my latest trip to the dollar store I purchased a twin pack of straight razors – super fancy 2 blade versions.  I’m not about to compromise my expensive razors for this!  I decided to try it on my bed sheets.  They are a jersey knit and the first time we used them I also happened to be wearing blue pajama pants for the first time and wouldn’t you know they made my sheets have crazy blue pills!  Every time I look at them it makes me a little more crazy.  I also tried it on my poly-blend duvet cover that says dry clean only but I have washed it a few times resulting in our favorite – pilling!  Here are some before shots.

pills on sheetspills on fabric

pills on fabric

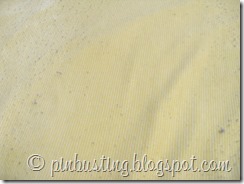
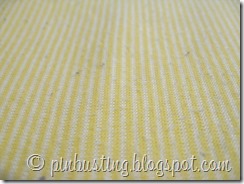
And here are the afters….

IMG_8524IMG_8526IMG_8527IMG_8530

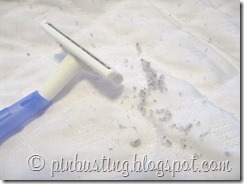
It totally worked.  Now, it would take me over an hour to do the whole sheet and maybe another hour to do the duvet…. but an average sweater would be far faster.  The thing that takes time is not the shaving – I did that with very quick strokes, but the razor gets gummed up and filled with all the pills and you have to keep cleaning it out.  The cleaning out part is tricky to not cut yourself too!

Bottom line – do it – but best used on small items

It definitely worked without harming either fabric at all.  And it’s possible that using a razor with more blades might help speed up the process – if you’re willing to sacrifice the $4 blade!  I will absolutely try on a few sweaters that I’d like to save from donation or crafting :)

IMG_8531

Stephanie

Thursday, February 28, 2013

Pin 33–PAM dries nail polish

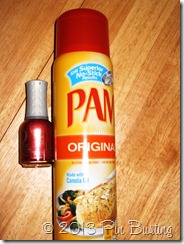
I am in desperate need of manicure so please don’t judge the up close and personal shots of my cuticles.  And, yes, I bite my nails and pick at my pam dries nail polishcuticles and I know it’s not good and I should stop.  My mother has been after me since I was 5 about it.  Some habits are just too tough to break!  Anyways, I have managed to stop biting for lengths of time and during that time treat myself to a manicure or two.  But, especially for my toes, I can’t always squeeze a mani-pedi into the budget so I do it myself.  This is far less fun but I’ve gotten pretty good at it.  I am severely patience-impaired when it comes to something like nail polish drying.  It’s not just waiting for it to dry enough to basically function it needs to set enough so that you don’t get dents etc.  The worst is doing it in the evening and it doesn’t set enough before bed and you end up with the cross-weave pattern from the sheets on your freshly painted fingers and toes.  Super annoying.  I just don’t have that kind of time now that I’m chasing a toddler!  THIS PIN says that spraying wet nails with PAM cooking spray, of all things, will dry them instantly.  Ridiculous it sounds, but also amazing if it works.

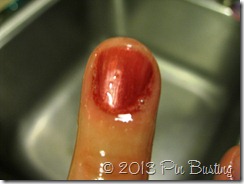
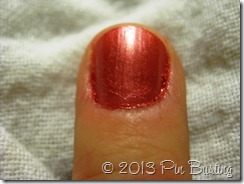
So I painted a finger nail… yes just one.  My nails are in no shape to show off with a bright color right now but I’m dying to know if this works and didn’t want to ruin a whole set of nails if it didn’t…  So once the paint was on – one thick coat – I went over to the sink and sprayed the PAM on.  I took a picture then washed my hands gently with soap and water and patted dry… and guess what???  DRY!  Totally dry, no marks even from the towel.  I tried to mark it up with another nail, but not a scratch or dent.

pam dries nail polishPAM dries nail polish

Bottom line – ABSOLUTELY DO IT!!

Totally works.  I have no idea why and I don’t even care.  I will definitely be doing this once I stop chomping on my nails for a bit….  I know I know… I’m trying…. Paint away and pick some fun pretty spring colors so I can have pretty hands vicariously through you :)

Stephanie

Tuesday, February 26, 2013

Pin 32–ammonia cleans gas stove grates

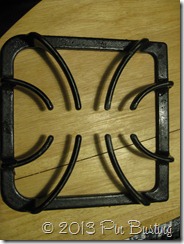
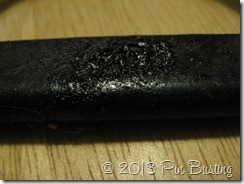
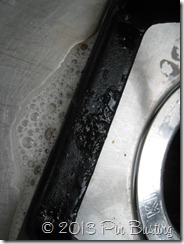
Hello again!  Lovely to have you back…  I hope no one was too bored with all the paint pins!  But we are on to new things this week.  When we bought our house I wasn’t sure how I felt about the gas range that came with the house.  Almost 3 years later I LOVE cooking on it but HATE keeping it clean.  It has a black top which makes every little crumb and spot show up immediately.  I am not the neatest of cooks so it gets dirty all the time and it’s hard to wipe up when it’s still hot and harder to remember to wipe it up once it has cooled down.  So I end up with nasty grates.  I saw THIS PIN and had high hopes for a small effort big results cleaning solution.
dirty gas stove gratedirtry stove grate
So I got my ziploc bag and ammonia out.  The first problem was my grate did not fit in the bag.  So I had to improvise, using small kitchen trash bags (I doubled up just in case of leaking).  Then I added 3 T of ammonia (the pin says 2-3 but since mine were so gross I did the 3), tied up the bag and shook a bit.  Then I left it on the counter overnight. This is what I got.
grate still dirty after ammoniaammonia cleaned grease

It seemed to take some of the nastiness off the bottom areas but not anywhere else.  Major disappointment. :(
Bottom line – don’t bother
There was definitely grease taken off but not enough.  I might try soaking over night (submerged) in a tub of diluted ammonia next time.  Somehow I don’t think this lazy girl will be getting a clean stove without some scrubbing action though!
Stephanie

Friday, February 22, 2013

Painting Pins Blowout!

painting tipsAs I mentioned in an earlier post, I’ve done LOTS of painting since we bought our house and over time have tried a lot of different tips, tricks, and supposed shortcuts…  I have found some of them on Pinterest and shared them with you.  But today, I’m going to just run through the things I’ve tried in the past sans my own pictures.  Just a quick run down to help you out next time you get ready to paint some walls!  Click pictures for pins, sources or products - just remember I am not paid to endorse anything linked to and I am not responsible for the quality of product or services you obtain through links :)  I am only providing them so you can see what I am talking about!

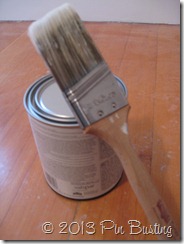
1.  Use a good brush – my favorite for cutting in is a 2” angle brush that costs me about $15.  It’s a little steep but if you take care of it well it lasts a long time and is well worth the investment!

2.  Use contractor's paper to cover the floor (hard floors).  It’s cheap and you don’t trip on it. Just use some painter’s tape to hold it down.

3.  Buy a reusable flexible plastic spout for pouring paint.  It cuts down on5 Paint Spout Extenders the mess of pouring out of the can and lets you put the lid back on better because there isn’t a well of paint in the groove.  And it makes it easier and neater to take the lid back off later because there isn’t dried paint gluing it down.  I have a few and they cost me a couple bucks at the big hardware stores paint departments.

4. Unless you are super horrible at cutting in don’t tape the whole room.  It takes forever, it’s difficult to do it totally straight and it’s hard to get it off without pulling at the paint you so carefully put where you want it.  Now, believe me if there is something important expensive to paint against, by all means tape.  You can bet your behind I taped the edges of the $$$$ tile work we had in our bathroom (whole floor, shower walls and ceiling!).  But generally I don’t tape for ceilings or trim.  Instead of spending a bunch of time with tape, take extra time being careful cutting in.

5.  Go around the room in the natural direction.  For me, it’s going from left to right.  I’m righty and I do better with paint strokes from left to right.  I can see better and I have more coordination.  Next time you paint think about which direction seems better.  Your results will be better if you work to your strength! Wooster® Painter's Comb (1831) - Ace Hardware

6.  Use a paintbrush groomer/cleaner to clean your brush.  It looks a little scary but it makes a HUGE difference!  It has metal spikes on one side to comb out the brush as you rinse it and a metal brush on the other to brush off dried paint from the metal parts and upper bristles.  Again, only a few dollars investment – I have this specific one and love it.

Painting tip: Wrap aluminum foil around doorknobs and hardware when painting to catch dribbles. It forms a mold and stays in place.7. Wrap things like doorknobs is foil or plastic wrap. It takes 2 seconds and you won’t be mad at yourself for bumping the roller into them. 

8.  But if it all possible just take off all hardware – switch plates, outlet plates, doorknobs, curtain rod paraphernalia….  anything you can remove will make painting go much faster.  For things like sinks and toilets it’s pretty unlikely you’ll take them out so wrap those is plastic wrap.  But if you are starting from scratch paint the walls BEFORE installing them!

9.  Use a fine sanding sponge between coats, especially when using a paint with any gloss to it.  It’ll get those tiny little bumps off.  Just make sure to wipe down the walls again!

10.  When you’re having a hard time choosing a color – get some white cardstock (or similar color to what you’re painting on) and paint the papers then tape them all over the room.  You’ll be able to see what the color looks like in all parts of the room and different lights at the same time.  And one little sample paint will paints lots of pieces of cardstock.painting tip - line paint tray with foil. Clean up is a snap, just be sure to let the paint dry before you throw it in the trash.

11.  I have lined my roller tray with foil several times.  It is a great thing to do when you don’t want to keep buying those things but pay attention to the types of grooves.  It worked best for smaller job and trays that had bumps as opposed to lines.  The lines were too sharp and broke through the foil after a bit so I still had to deal with paint on the actual tray.  So just look close at the tray before bothering.

Paint tip12.  If you’re painting a ceiling get one of those shields that attach.  It’ll keep the spray off your floor and your hair.  And when you’re cutting in for a ceiling or other high areas cut a plastic container lid to sit around the brush to prevent drips.

13.  If you have to wait some time between coats or need to stop in the middle, wrapping your roller/brush in plastic wrap then putting in a plastic bag will keep it from drying – for a bit.  Best if you’ll be getting back to it within 24 hours because otherwise there are some dry bits that end up on the wall… we learned the hard way on this one :)

I think that exhausts my wisdom on painting…  do you have any other tips to add??

Stephanie
Thursday, February 21, 2013

Pin 31–acne pads clean up paint

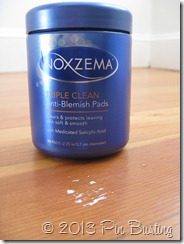
Inevitably while painting some paint ends up on the floor, for me at least.  I’ve gotten pretty good at avoiding much, but there’s always the almost fall acne pads to remove paintoff the stepladder or losing your balance in some awkward position to get that tight corner and then there are blots of paint.  Or, my favorite, you don’t realize the blot then step in in and you’ve got textures paint marks around the room.  With latex paint clean up is generally not too bad but there is always the 1 or 2 marks that just won’t come up.  THIS PIN says you can use acne pads or facial cleaning wipes to get them off.  Supposedly the alcohol helps lift the paint.

So here’s one of my paint marks…  annoying.  I could’ve probably scratched it off after a bit of work but who wants that w-word.  Here goes…

paint splatter

and… woohoo!  minimal effort, paint gone! excellent.

clean floor

Now I’m sorry to say it didn’t work out so well for this little bugger…

thick paint spot

Bottom line – worth trying

It didn’t take very long to realize that the more smudgy-smeary type paint marks came up a bazillion times easier than the blot types.  It could be that the paint was too thick I suppose but it still came up using my finger nail.  The source site says it’s best used within a day of drying which I did not make (it was nearly 4 days after).  It’s a great shortcut for the thinner marks for sure.  I’m sure the sooner you get to it the better it works.  As a warning though, after going through the room and cleaning up all my marks (more than usual I have to say – it’s like I was painting drunk!) my fingers were really dry and smelled like the pads.  After several washings and lotion applications they were better but still felt tight.  More than 24 hours later I still feel like I lost my fingerprints.  I’m sure it will go back to normal but if you’ve got a lot of marks maybe grab some latex gloves!

used acne pads on paint

Stephanie
PS – As of posting this it’s been a week since I did this and my finger tips went through a whole scaly, flakey and peeling thing.  I’m sure it was the salicylic acid in the pads.  So either wear gloves or use something without acne medication if you’ll be cleaning up a bunch of spots like me!

Tuesday, February 19, 2013

Pin 30–trim roller to avoid paint lines

Another week of paint pins!  Woohooo!

Kidding – I don’t expect anyone to be this excited :)

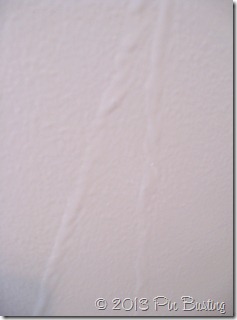
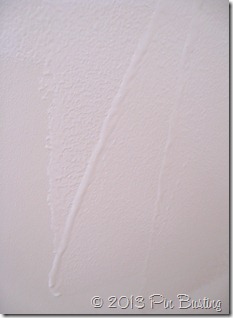
So THIS PIN suggests trimming the edge of the roller to avoid that tendency for rollers to leave a goupy line on the wall that you have to spread out.  Seems reasonable right?

trim paint roller

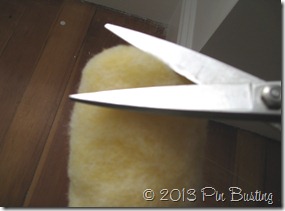
So I trimmed my roller on both ends with regular scissors.  Do it over the trash as the loose fuzz can fly away easy.  Then I painted as usual.  This is what I got.

paint lines on wallpaint lines on wall

Yeah that’s right the line still showed up.  Now in fairness it wasn’t as often and really only when the roller was full of paint or I pressed a bit harder, but it still showed up.

Bottom line – not worth it

It really didn’t have enough of an effect to make me want to do it again.  It was just another step added before getting to paint.    On the other hand if you do enough painting that you wash and reuse high quality rollers, it might help to cut of that same area if there is some crusty paint that won’t come off.  And that’s pretty much all I have to say about it :)

More to come on Thursday!

Stephanie
Friday, February 15, 2013

Pin 29–tape to remove lint from roller

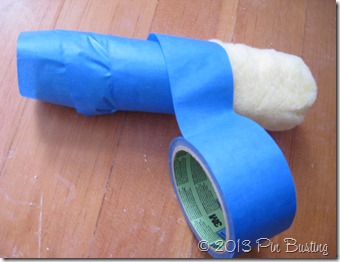
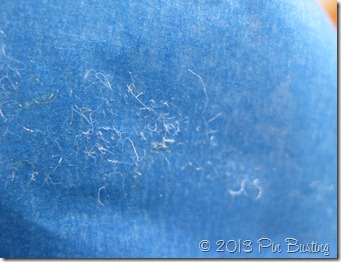
Bonus Pin!!!  I’ve been hearing from some of you that you are planning on doing some painting of your own soon and I didn’t want to hold out on this one!  There are a few variations of it – using various tapes, lint rollers, whatever – but the general idea is use something sticky to wrap around the roller before you paint. 

tape to remove roller lint

tape to remove roller lint

TADA!  All that lint would’ve ended up on your wall!  Boooooooooooo!

Bottom line – DO IT!!

I’ve actually been doing this for a long time.  It’s quick and easy and since you’re set-up for painting there is usually painters tape hanging around within reach.  It works just as well if you use masking tape or a strong lint roller.  If I’m using  a longer nap roller I might do it twice to really get all of it.  Super awesome way to avoid pulling paint soaked linty things off your wall while you’re painting.

One more week of paint pins coming up!

Stephanie
Thursday, February 14, 2013

Pin 28–vanilla cuts down paint fumes

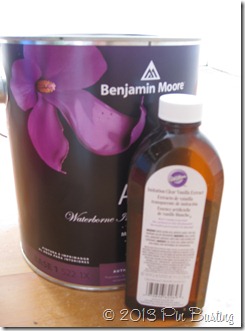
I’ve done enough painting to come to terms with the smell.  I actually kinda like it , which makes me weird I’m sure.  But it’s definitely not good to be in a closed spaced with paint fumes for long.  I’ve been trying to buy vanilla in paintlow or no VOC paints to help with this but it’s really hard to totally escape the smell.  THIS PIN says that adding vanilla extract to paint will make it smell nice instead.  I love the smell of vanilla – probably because it usually comes with dessert!  So it seemed like a great possibility.

I was a bit worried that the color of the extract would change the my paint color since I was using a shade of white so I decided to use clear vanilla that you can find at any store that sells cake decorating supplies. 

I have to say that there was not the teeniest noticeable difference, even after at least 2 oz.  Maybe I could’ve added more but the paint is expensive enough I’m not going to waste a few dollars pouring vanilla into it!

Bottom line – waste of time

I honestly couldn’t even smell the vanilla after stirring the paint.  Extracts are not exactly cheap and I know my paint wasn’t so I just wasn’t willing to possibly ruin the paint and waste all my vanilla.  Had I a darker hue of paint I might have been a little more daring so please give me a shout if you’re willing to dump ounces of vanilla into your paint!!

Bonus paint pin tomorrow!

Stephanie